The Fender Telecaster, the world’s first successful electric guitar, offers timeless tone and versatility. Its wiring, featuring a three-way switch, volume, and tone controls, ensures optimal sound and functionality.
1.1 Brief History of the Fender Telecaster
The Fender Telecaster, introduced in the early 1950s as the “Nocaster,” revolutionized music with its innovative design. Renamed the Telecaster in 1952, it became the first commercially successful electric guitar. Designed by Leo Fender, it combined simplicity, durability, and versatility, making it a favorite among musicians. The Telecaster’s single-cutaway body and bolt-on neck set it apart from earlier guitars. Its twangy, crisp tone, produced by its single-coil pickups, defined genres like country, rock, and blues. Over the years, the Telecaster has evolved, with models like the Telecaster Custom and Deluxe, but its core design remains unchanged. Its enduring popularity is a testament to its timeless appeal and tonal versatility.
1.2 Importance of Proper Wiring
Proper wiring is essential for the Fender Telecaster to function optimally. Correct connections ensure pickups, switches, and controls work seamlessly, delivering the desired tone and performance. Improper wiring can lead to issues like hum, loss of signal, or malfunctioning controls, undermining the guitar’s playability and sound quality. Accurate wiring maintains the integrity of the Telecaster’s classic design, preserving its legendary twang and versatility. It also prevents potential damage to components and ensures reliability. For players seeking to modify or customize their Telecaster, proper wiring is the foundation for achieving desired tonal variations without introducing unwanted noise or operational problems. Thus, precise wiring is crucial for both stock and custom configurations to maximize the guitar’s potential and maintain its iconic status.
1.3 Overview of Telecaster Electronics
The Fender Telecaster’s electronics are designed for simplicity and versatility. At its core are two single-coil pickups (neck and bridge), a three-way pickup selector switch, a master volume control, and a master tone control. These components are connected via a wiring harness that includes a tone capacitor (tone cap) and an output jack. The electronics are mounted on a pickguard or control plate, making them easily accessible for modifications or repairs. The Telecaster’s circuit is straightforward, with minimal components compared to other guitars, which contributes to its clean, crisp tone. Proper grounding and shielding are essential to prevent hum and ensure optimal performance. This design has remained largely unchanged since the 1950s, making it a benchmark for electric guitar electronics.
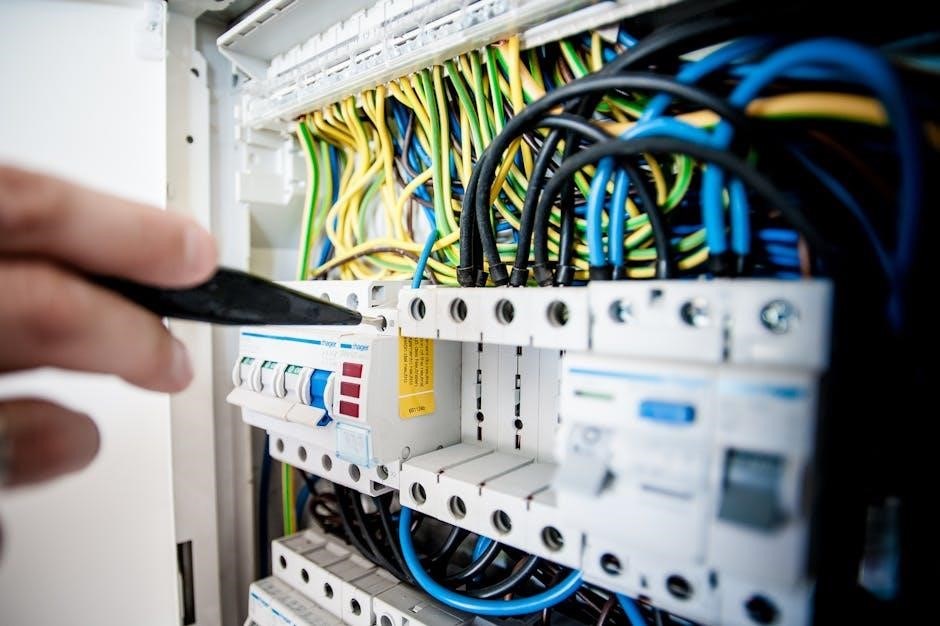
Components of Telecaster Wiring
The Telecaster’s wiring includes pickups, a three-way switch, volume and tone controls, a tone capacitor, and an output jack, all connected through a wiring harness.

2.1 Pickups (Neck and Bridge)
The Telecaster features two single-coil pickups: one at the neck and one at the bridge. These pickups are designed to capture distinct tonal characteristics, with the neck pickup delivering warm, smooth tones and the bridge pickup providing bright, crisp sounds. Both pickups are typically wired in parallel, allowing for a wide range of tonal options. The neck pickup is often wound slightly hotter to balance the bridge’s brightness, while the bridge pickup is designed to cut through mix. Proper wiring ensures these pickups function optimally, with clear output and minimal hum. Many modern Telecasters also offer optional coil-splitting or humbucker configurations for added versatility. The pickups’ wiring is crucial for achieving the classic Telecaster sound.
2.2 Three-Way Pickup Selector Switch
The three-way pickup selector switch is a fundamental component of the Telecaster’s electronics, allowing players to choose between the neck pickup, bridge pickup, or both. This switch is wired to provide three distinct tonal options: the neck pickup alone for warm, smooth tones; the bridge pickup alone for bright, crisp sounds; and both pickups together for a balanced, full sound. The switch is typically a simple on-on-on design, with each position connecting the selected pickup(s) to the output. Proper wiring ensures seamless switching between pickups, maintaining the guitar’s signature clarity and versatility. While the standard three-way configuration is straightforward, custom modifications can expand its functionality, such as adding a fourth position for series wiring or other unique configurations.
2.3 Volume and Tone Controls
The Telecaster features a master volume control and a master tone control, both typically implemented using 250kΩ pots; The volume pot adjusts the overall output level, while the tone pot rolls off high frequencies, allowing for a smoother sound when reduced. These controls are wired in a straightforward manner, with the volume pot connected directly to the output jack and the tone pot placed in the signal path. The tone circuit includes a capacitor, usually a 0.047µF disc ceramic type, which filters high frequencies as the tone knob is turned. Proper wiring ensures smooth operation, maintaining the guitar’s classic tone and functionality. Using high-quality components, such as CTS pots, is recommended for optimal performance and reliability.
2.4 Capacitor (Tone Cap)
The capacitor, often referred to as the “tone cap,” plays a crucial role in shaping the Telecaster’s tone. Typically, a 0.047µF disc ceramic capacitor is used, though other values like 0.022µF or 0.1µF can be experimented with for different tonal preferences. The capacitor is wired in series with the tone potentiometer, creating a high-pass filter that removes high frequencies as the tone knob is turned. This allows players to achieve a warmer, more mellow sound when desired. The capacitor’s value affects the frequency cutoff, with smaller values preserving more high-end clarity and larger values producing a darker tone. Proper installation and selection of the capacitor are essential for maintaining the guitar’s tonal integrity and functionality.
2.5 Output Jack and Grounding
The output jack and grounding system are essential for ensuring proper signal flow and noise reduction in the Telecaster. The output jack connects the guitar to the amplifier, while the grounding system ensures that all metal components are at the same electrical potential, minimizing hum and interference. Proper grounding involves connecting the bridge, tremolo claw, and other metal parts to the guitar’s electronics. A poorly grounded system can result in buzzing or loss of signal. The output jack should be securely soldered to the guitar’s wiring harness, with the tip connected to the hot signal and the sleeve grounded. Using high-quality shielding wire and ensuring all connections are tight and free of corrosion is crucial for optimal performance and reliability.

Standard Telecaster Wiring Configurations
Standard Telecaster wiring configurations include the classic 3-way switch, 4-way switch, and 50s wiring. These setups provide versatility, offering a range of tonal options while maintaining simplicity and reliability.
3.1 Classic 3-Way Switch Wiring
The classic 3-way switch wiring is the foundation of the Telecaster’s electronics. It allows players to select between the neck pickup, bridge pickup, or both simultaneously. In the first position, the bridge pickup delivers sharp, twangy tones, ideal for rhythm and lead. The middle position combines both pickups, offering a balanced sound with added warmth. The third position engages the neck pickup, providing smooth, mellow tones perfect for jazz or clean playing. This configuration is simple yet versatile, making it a favorite among players. Proper installation ensures optimal performance, and diagrams are widely available for reference. This setup remains a cornerstone of Telecaster wiring, offering reliability and timeless tone.
3.2 4-Way Switch Wiring (Series/Parallel Options)
The 4-way switch wiring expands the Telecaster’s tonal possibilities by introducing a fourth position. Positions 1-3 function like the classic 3-way switch: bridge pickup, both pickups in parallel, and neck pickup. The fourth position engages both pickups in series, creating a fuller, richer sound with increased output and a deeper low-end response. This configuration retains the Telecaster’s signature clarity while adding versatility. It appeals to players seeking more tonal options without complicating the control layout. The series wiring provides a bold, humbucker-like tone, making it ideal for genres requiring heavier sounds. Diagrams for this modification are widely available, offering clear guidance for installation. This upgrade is a popular choice for those looking to enhance their Telecaster’s versatility while maintaining its classic charm.
3.3 50s Wiring (Vintage Spec)
The 50s wiring configuration is a faithful recreation of the original Telecaster electronics from the 1950s. It features a specific capacitor value (typically 0.047µF) and a distinct wiring approach that preserves the guitar’s vintage tone. This setup ensures that the tone control operates smoothly, with a gradual roll-off of high frequencies, maintaining clarity and definition. The volume control also retains its characteristic response, providing a natural decay when reduced. Players who prefer a classic, unaltered Telecaster sound often opt for this wiring, as it delivers the authentic twang and snap associated with vintage models. The 50s wiring is ideal for those seeking a historically accurate tone without modern modifications, making it a popular choice for purists and enthusiasts of vintage guitars.

Custom Telecaster Wiring Modifications
Custom wiring modifications allow players to enhance their Telecaster’s versatility. Popular mods include coil splitting, adding a blend pot, or installing active electronics for expanded tonal possibilities and unique sounds.

4.1 Adding a Neck Humbucker
Adding a neck humbucker to your Telecaster expands its tonal versatility, offering fuller, richer sounds. This modification involves installing a humbucker pickup in the neck position, often paired with a 4-way switch to include series and parallel wiring options. The humbucker provides a warmer, higher-output tone compared to single-coils, reducing hum and noise. Proper wiring requires connecting the humbucker’s coils correctly to the switch and pots. While this mod is popular for its enhanced tonal range, it slightly deviates from the classic Telecaster sound. Ensure precise soldering and grounding to maintain proper functionality. Consulting a detailed wiring diagram is essential to achieve the desired configuration without issues.
4.2 Coil Splitting for Single-Coil Tones
Coil splitting is a popular modification that allows humbucker pickups to function like single-coils, delivering brighter, snappier tones. This is achieved by wiring the humbucker to short out one of its coils, effectively turning it into a single-coil pickup. Typically, this is done using a push-pull pot or a mini-toggle switch, enabling players to switch between full humbucker and single-coil modes. Coil splitting adds versatility to the Telecaster, offering a wider range of tonal options. However, it can introduce hum in single-coil mode, as only one coil is active. Proper wiring is essential to ensure functionality and tone quality. This modification is ideal for players seeking to expand their Telecaster’s sonic capabilities without altering its classic aesthetic.
4.3 Active Electronics and Preamps
Active electronics and preamps offer enhanced tonal control and clarity for Telecaster players. By integrating active pickups or a preamp system, musicians can achieve a wider dynamic range and reduced hum. These systems typically require a power source, such as a 9V battery, and involve additional wiring for the active components; The preamp can be installed in the guitar or as an external unit, providing adjustable gain and EQ options. This modification is ideal for players seeking modern, high-fidelity tones while maintaining the Telecaster’s classic appeal. However, it requires careful installation to ensure proper grounding and signal flow. Active electronics add versatility but may alter the guitar’s traditional character, so it’s important to weigh the benefits against potential changes to the instrument’s original sound and aesthetics.

Troubleshooting Common Wiring Issues
Identify and resolve wiring problems like faulty pickups, tone loss, or grounding issues. Proper diagnostics and soldering techniques are essential for restoring optimal functionality and sound quality.
5.1 Pickups Not Working Properly
If your Telecaster’s pickups aren’t functioning correctly, check for loose connections or faulty soldering. Ensure the pickup selector switch is clean and free from corrosion. Verify that the pickups are properly grounded to the guitar’s bridge or metal components. If issues persist, inspect the wiring for breaks or short circuits. Testing each pickup individually can help isolate the problem. Additionally, ensure that the output jack is securely connected and functioning properly. If all else fails, consult a wiring diagram specific to your Telecaster model to trace the circuit and identify any mismatches or errors in the wiring configuration.
5.2 Loss of Tone or Volume
A loss of tone or volume on your Telecaster can often be traced to wiring issues. Check the tone capacitor for proper installation and ensure it’s wired correctly. Verify that the volume potentiometer is functioning and that its output lug is connected to the output jack. If using a tone control, ensure the capacitor is grounded correctly and not shorted. Faulty or corroded connections, especially at the tone and volume pots, can also cause signal loss. Clean the pots and inspect the wiring for breaks or soldering errors. Additionally, ensure the three-way switch is wired correctly, as improper connections can bypass the tone circuit entirely. Referencing a wiring diagram can help identify mismatches in the circuit.
5.3 Grounding Problems and Hum
Grounding issues are a common cause of hum in Telecaster wiring. Proper grounding ensures noise reduction and clear signal transmission. If the guitar hums excessively, check the grounding wires for breaks or poor soldering. Ensure the bridge and tremolo system are properly grounded, as this is crucial for noise cancellation. Verify that the volume potentiometer’s ground lug is connected to the tone circuit and output jack. Faulty or corroded connections can disrupt the ground path, leading to hum. Additionally, check the tone capacitor’s grounding, as improper installation can introduce noise. If hum persists, inspect the pickups’ grounding wires and ensure they are securely soldered to the appropriate points. Consulting a wiring diagram can help identify grounding mismatches and ensure all components are properly connected.

Resources for Telecaster Wiring Diagrams
Find official Fender diagrams and third-party resources like GuitarElectronics.com and Fralin Pickups for accurate Telecaster wiring guides, covering standard and custom configurations.
6.1 Official Fender Wiring Diagrams
Official Fender wiring diagrams are the most reliable resource for accurate Telecaster configurations; Available on Fender’s website, these diagrams provide detailed schematics for various models, including the Classic Telecaster, Noventa Telecaster, and more. They are presented in clear PDF formats, making it easy to download and reference. These diagrams cover standard 3-way switching, volume, and tone controls, as well as specific wiring for unique models like the HS/SH Telecaster. Fender also offers instructions for proper installation and troubleshooting, ensuring enthusiasts can achieve authentic tones. By following these official guides, players can maintain their guitar’s integrity and functionality, whether performing routine maintenance or upgrading electronics.
6.2 Third-Party Wiring Resources
Beyond official Fender diagrams, third-party resources offer extensive Telecaster wiring guides. Websites like GuitarElectronics.com and FralinPickups.com provide detailed schematics for both standard and custom configurations. These resources often include step-by-step instructions and images, catering to DIY enthusiasts. Additionally, forums and communities share user-generated diagrams, offering unique modifications and troubleshooting tips. Some sites, such as SixStringSupplies.co.uk, specialize in Telecaster wiring, offering advanced setups like 4-way switching and push-pull pot configurations. These third-party resources are invaluable for those seeking to explore beyond factory specifications or address specific wiring challenges, ensuring a wide range of tonal possibilities for Telecaster owners.
6.3 Video Tutorials and Guides
Video tutorials and guides provide hands-on instruction for wiring your Telecaster. Platforms like YouTube offer detailed step-by-step videos, covering topics from basic setups to advanced modifications. Channels such as “addictedtogear” and “FralinPickups” share comprehensive wiring guides, while specific videos demonstrate installations like 6-way switches or custom harnesses. These visual resources are ideal for DIY enthusiasts, offering real-time demonstrations that complement written diagrams. Many videos also address common issues, such as grounding problems or pickup configurations, making them invaluable for troubleshooting. Whether you’re a novice or experienced, these guides ensure clarity and precision, helping you achieve the desired tone and functionality for your Telecaster.

Advanced Telecaster Wiring Topics
Explore complex modifications like 6-way switches, blend pots, and custom wiring for unique tonal options, enabling expanded versatility and personalized sound shaping for experienced players.
7.1 6-Way Switch Wiring
A 6-way switch wiring configuration unlocks unprecedented tonal versatility for Telecaster enthusiasts. This advanced setup allows players to access a wide range of pickup combinations, including series and parallel wiring options. Unlike the standard 3-way switch, the 6-way switch provides six distinct tonal variations, enabling unique sounds such as neck and bridge pickups in series for a humbucker-like tone or parallel for a brighter, single-coil sound. This modification is ideal for musicians seeking to expand their guitar’s sonic capabilities without sacrificing the Telecaster’s iconic simplicity. Proper installation requires precise soldering and a deep understanding of the circuit layout. With a 6-way switch, the Telecaster transforms into a highly adaptable instrument, catering to diverse musical styles and preferences.
7.2 Adding a Blend Pot
Adding a blend pot to your Telecaster offers enhanced tonal flexibility by allowing you to mix the neck and bridge pickups in various proportions. This modification is ideal for players seeking a wider range of sounds beyond the standard pickup configurations. The blend pot enables smooth transitions between pickups, creating unique tonal textures that can add depth to your playing. Installation involves soldering the potentiometer between the pickups and the output, ensuring proper grounding and signal flow. A high-quality 250kΩ potentiometer is recommended for single-coil pickups to maintain optimal tone. This simple yet effective upgrade can significantly expand your Telecaster’s sonic capabilities, making it a valuable addition for versatile musicians.
7.3 Custom Wiring for Unique Tonal Options

Custom wiring opens up a world of unique tonal possibilities for your Telecaster. By modifying the circuit, you can achieve sounds that go beyond the standard configurations. One popular option is coil splitting, which allows you to access single-coil tones from humbucking pickups. Another is the series/parallel switch, which offers humbucker-like warmth or single-coil clarity. Active electronics, such as preamps, can also be integrated to boost gain and enhance sustain. Additionally, custom wiring can incorporate unique components like tone caps with different values or specialized switches for expanded pickup combinations. These modifications enable players to tailor their Telecaster’s sound to their musical style, making it a versatile tool for any genre. With custom wiring, the possibilities for tonal experimentation are virtually endless, allowing you to craft a truly personalized sound.